I recently bought a film camera for my sister, a Nikon FM. She enjoys mountaineering and often wears sunglasses but upon receiving the Nikon FM i saw how hard it is to view the full viewfinder especially with glasses. The issue is a combination of the high magnification of film camera (to facilitate focusing ?) and the small size of the viewfinder lens, this makes it so that you really have to stick you face to the camera to get a good view of the image.
The precise technical word to describe how far your eye should be from the viewfinder is eye relief. A long eye relief mean you can view the full image in the viewfinder even when your eye is further from the lens. Such viewfinders are often marketed toward glasses-wearer. Some film camera were specifically designed to have long eye relief (ex the Nikon HP viewfinder and Action Finder) that is really cool but those options are out of my budget for this gift.
Having already bought the Nikon FM I though, what could I do to improve this a bit ? After thinking and researching a bit it turns out it is very difficult in optics to relay a image without inverting it and while increasing eye relief and staying compact.
The thing is that projecting an image with a lens inverts it (upside-down and left-right). The easiest way to project and not rotate an image would be to use two relay lenses (think two imaging lenses) the relayed image is inverted two times so you end up with the original image. Another possibility is to use a image rotating prism . But both configurations are large and bulky making it unfit for eyepiece accessories.
The best solution seems to be using a Galilean beam expander (see more info here). This slightly reduces the image size while maintaining the eye relief enabling it to be view from a bit further than before. This principle was used in the canon eyepiece extender (ex : the EP-EX15II model which is used here)
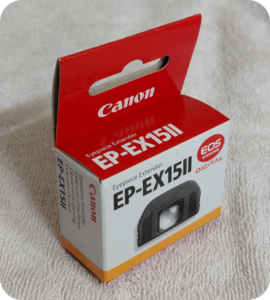
In this article I will show you how I converted this canon accessory to work with the antique Nikon FM camera. This method should however work more generally with any film camera with a hot shoe above the viewfinder. There is two canon eyepiece extender the “EP-EX15” and the “EP-EX15II”. You will need the “EP-EX15II” which is smaller and the perfect size and shape for the Nikon FM camera. This accessory was made for canon DSLRs and can still be found new in certain shops. Unfortunately with the discontinuation of DSLR they might soon disappear from new stock but as of now they are available new for less than 20$ in south Korea.
For this project you will need :
- 1x EP-EX15II eyepiece extender
- 1x canon EF eyecup
- 1x small copper alloy metal plate (ex : 1mm thickness 60mmx40mm nickel silver or brass)
- A jeweler saw with 3/0 blades
- A good quality P00 screwdriver ( a good quality one will help you not ruin the screw which are tight )
- A 2.5 mm and a 0.8 mm drill
- A center punch to center hole drilling
- A semicircle metal file and sand paper to tidy things up
- Parallel pliers
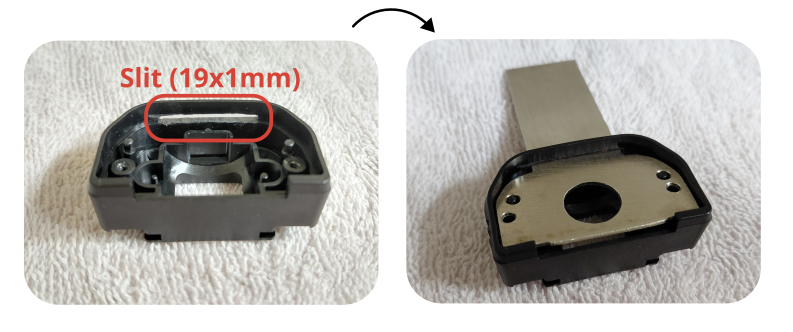
The project is really simple we will just replace the metal plate on the EP-EX15II , add a slit on the side of the plastic housing and mount it in the Nikon FM hot shoe :
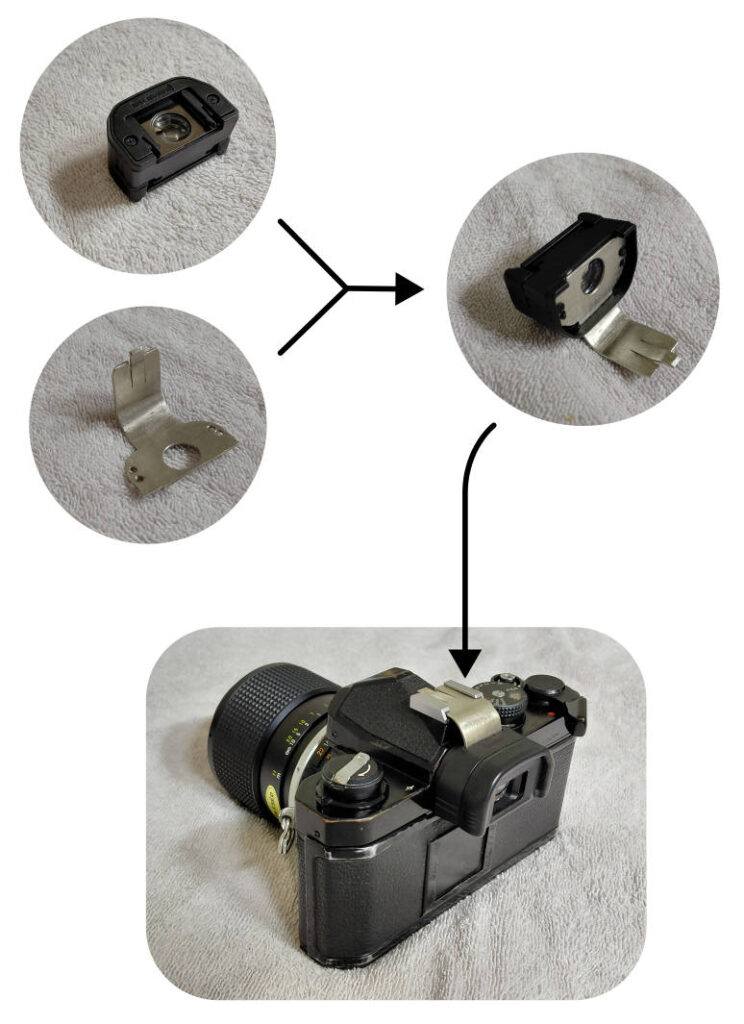
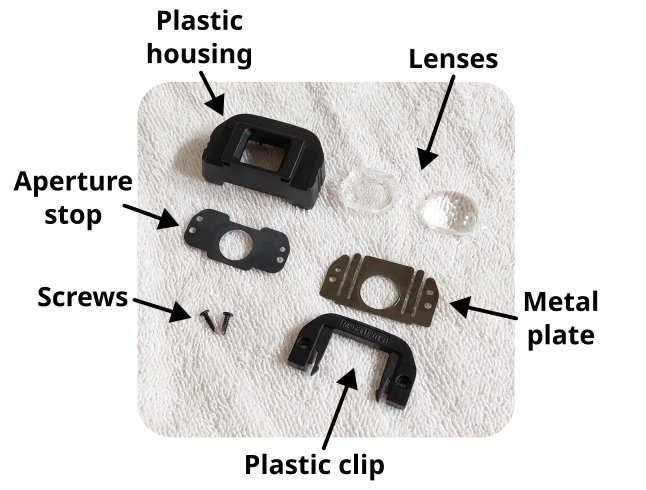
On the back of the EP-EX15II there is two screws. Remove them and detach the plastic clip and the metal plate. Also remove the thin black plastic film aperture stop and lenses and keep them preciously with the screws. Make sure not to make fingerprint on the lenses nor scratches ! Using gloves might help.
We will now use the original metal plate to make a stencile for our custom metal plate. Note that the metal plate is not symmetric (the screw and pin holes don’t have the same spacing on both side) so keep this in mind during the project. We can transfer on the 1mm thick copper alloy plate the original metal plate design and add a 19mm wide strip of metal on the top.
You can now cut the outline with a jeweler saw and drill the holes. I used a 2.5mm drill which makes holes slightly bigger than the original plate. This wont cause any problems and gives a little bit of jiggling room which is important to accommodate for handmade imprecision.
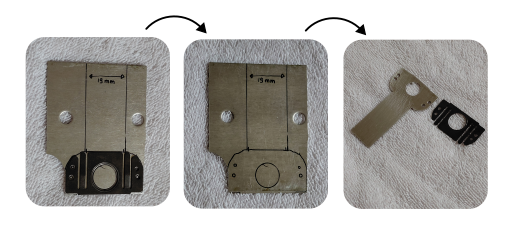
After cutting the plate with the jeweler saw use the metal file and sandpaper to tidy and deburr the edges.
Next we need to make a slit 19mm wide and 1mm thick slit on the top of the EP-EX15II to insert the new metal plate. Align the slit with the small edge on which the metal plate was rested and center it. Start making the slit using the 0.8mm drill to make a small hole. Then insert the jeweler saw and cut the slot. Once this is done try to fit your new metal plate in. Again pay attention to the right and left holes which are asymmetric.
We are almost done, now bend the top of the metal plate with pliers (preferably parallel pliers) so that the large hole is centered on the viewfinder when installed inside the hot shoe. You can also check with the enclosure and lens mounted if the whole viewfinder is clearly visible. In my case I found that the best view was when the extender was positioned very slightly lower than the center, but check this with your camera.
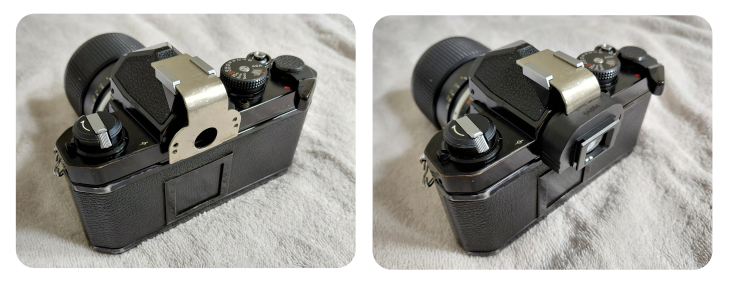
The extender is now fully functional but it can easily fall from the camera. We will add a retaining clip in the metal plate to avoid that. First shorten the metal plate so that it extends only 5mm out of the hot shoe. Cut a 15×5 mm tab at the center end of the metal strip. Finally, bend it so that it forms a retaining clip securing the extender inside the hot shoe. When inserted inside the hot shoe it should feel like it clicks into position !
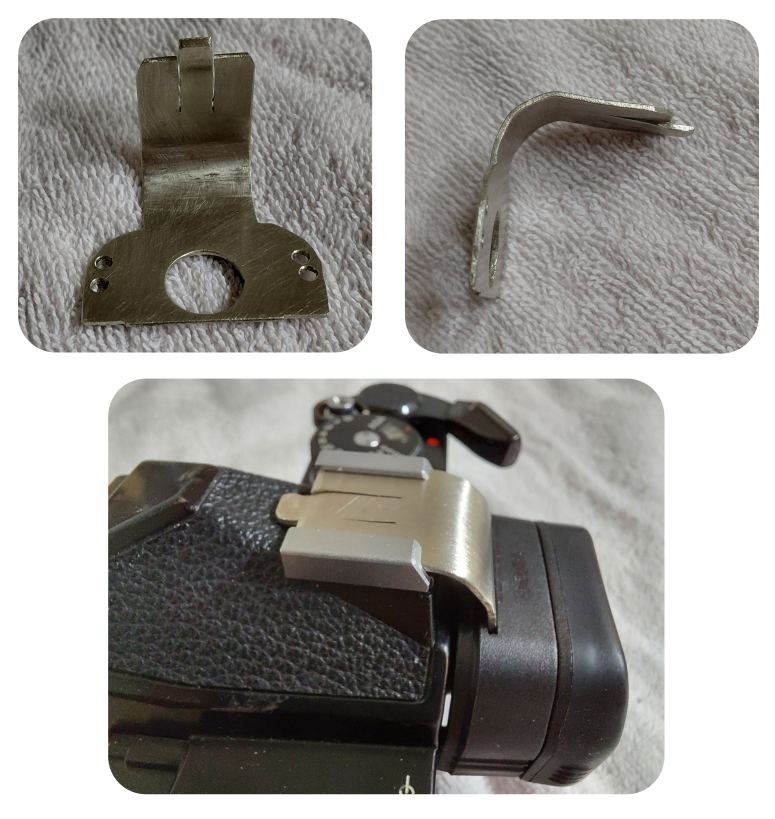
The metal plate is then polished and edges are rounded and voilà : the eyepiece extender is finished.
Using it reduces image size by 30%. Personally, I think it makes the image more comfortable to look at but you might find the experience less immersive. This will ultimately depend on your personal preference.
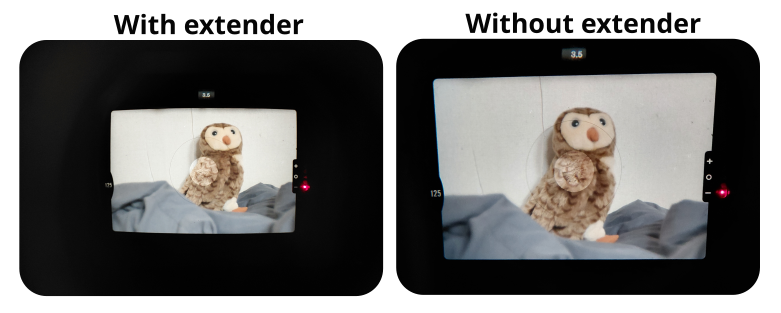
In term of providing eye relief the extender is the clear winner. It allows the view of the full image without pressing one’s face into the camera back. Additionally, for comfort, a canon EF eyecup can be installed on the extender or removed to increase the eye relief when using glasses.
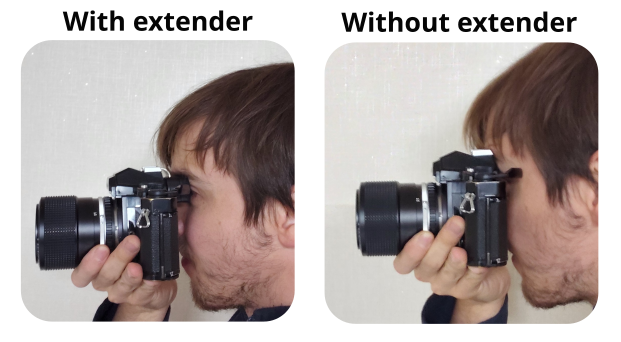
Overall this worked well and provided a small increase in eye relief and a good increase in comfort. The canon EP-EX15II extender’s lens are quite small and better performance as well as even longer eye relief could be obtained with custom larger optics but this would require much more work. For now, I will give it to my sister and we will see if she uses the camera with or without the extender.
1 Comment
This is a comment to test comment styling